Planning a Vinchy Art Gallery Wall With Multiple Panels
Choose the relationship between the pieces
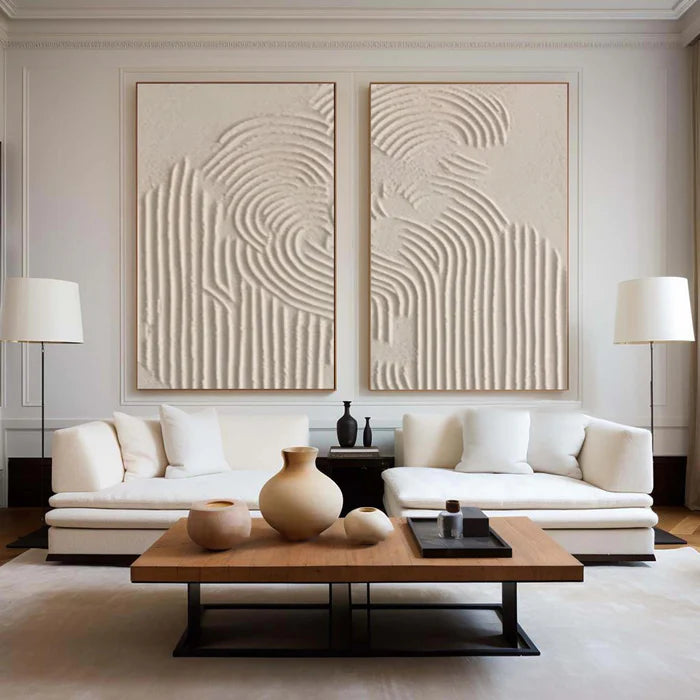
A multi-panel wall can use a coordinated set or several separately selected paintings. Begin by deciding whether the works should read as one composition or as individual pieces sharing a space. That choice affects order, spacing, alignment, and how you assess the arrangement from the room's normal viewing positions.
Identify the model and panel configuration before sketching the layout. Ask whether the selected set has a prescribed order or orientation, and which relationships are open to your preference. If combining separate works, decide what connects them: palette, scale, subject, or another feature. That intention gives the spacing discussion a purpose beyond copying a styled product image.
Confirm what the listed size means
For each piece, obtain the painted and outside dimensions, orientation, depth, and relevant frame information. Ask whether a set's selected size applies to each panel or the entire arrangement. The MM264 listing identifies a set of two, but your selected configuration still needs an explicit dimension explanation.
Create a panel schedule with a simple label for each piece, its painted dimensions, outside dimensions, orientation, and frame option. Retain the seller's explanation of the selected size beside it. Use outside dimensions to calculate placement, while keeping painted dimensions for the composition. This prevents an ambiguous set measurement from becoming the basis of the whole wall plan.
Calculate the complete footprint
Add the outside panel widths and the intended gaps for a horizontal arrangement. An illustrative pair of 20-inch-wide panels with a 3-inch gap occupies 43 inches across: 20 plus 3 plus 20. This is a planning example, not a measurement of MM264 or another product.
For a vertical stack, calculate the heights and gap in the same way. For a staggered arrangement, record the full bounding area and each panel's position. Do not add the gap to a size that already represents an entire set without first confirming what that supplied measurement includes.
Map the room constraints
Measure the usable wall after accounting for switches, shelving, furniture, doors, and other obstacles. View the area from the sofa, doorway, or working position. A multi-panel footprint can fit the empty wall while still interfering with movement or feeling different from a close planning image.
Check the full layout from your regular viewing positions and during ordinary use of doors and storage. Mark any furniture or lighting change that the plan depends on. If several arrangements fit, compare them using the same room measurements. The aim is a composition you enjoy within a space that remains practical, rather than a layout that works only after nearby objects are removed.
Use a layout before making holes
Create a paper or digital plan showing each outside rectangle and the gaps, using confirmed dimensions. Check any wall attachment against the surface and permissions before using a temporary template. Label the panels so a preview or installation discussion can identify each one unambiguously.
The room-preview service page describes submitting a photo, reference measurement, and desired configuration. Ask whether the proposed multi-panel layout can be represented and confirm current terms. A rendering can guide placement but does not establish physical color, hardware, or safe mounting.
Clarify panel order and orientation
Ask which panel belongs in each position and whether rotation is appropriate for the intended composition. Keep the confirmed arrangement with the specification. A near-symmetrical abstract may still have an intended orientation, and a photo crop can conceal the distinction.
For separate works, describe the relationship you want and ask what can be confirmed about the selected configurations. Keep a preference for visual cohesion distinct from an exact color requirement. Label the reference views and retain any accepted clarification. The plan should show both the intended arrangement and the expectations that guided the purchase.
Review finished pieces as a group where possible
When finished previews are supplied, identify each panel and its version. Ask for a view that helps assess the group if that matters to your decision. Keep any requested change tied to the affected panel and clarify whether the full arrangement needs another review.
Check the preview against the panel schedule: number of pieces, order, orientation, selected size, and frame. Ask about any unclear feature separately, recording the answer beside the relevant panel. Retain the latest approved version and dispatch clarification. A group image helps assess relationships, while the confirmed specification answers construction and measurement questions.
Plan receipt and installation by item
Confirm how many parcels are expected and how their contents connect to the panel schedule. Check completeness and visible condition after safe receipt. One delivered package does not establish that the entire arrangement is ready to install, so retain the item and shipment connections.
Ask an appropriate installer about the actual weights, supports, wall conditions, and mounting components. A paper layout establishes positions, not structural suitability. Keep professional preparation and installation costs in the overall plan rather than assuming a multi-panel purchase can be hung with a generic method.
Keep the final arrangement documented
Keep the panel schedule, final gaps, installed positions, and preparation records together. After installation, check the arrangement from the usual viewing positions and note any change from the original plan. If documenting the project, use original room photographs and explain those adjustments. An earlier rendering belongs with the planning record rather than as evidence of the finished wall.
A clear gallery-wall plan connects the visual idea with the dimensions, order, receiving arrangements, and installation work needed to realize it. A later buyer account can explain what worked and what required adjustment in that room. Those details give another reader a useful starting point while leaving the final spacing and composition to their own space and preference.