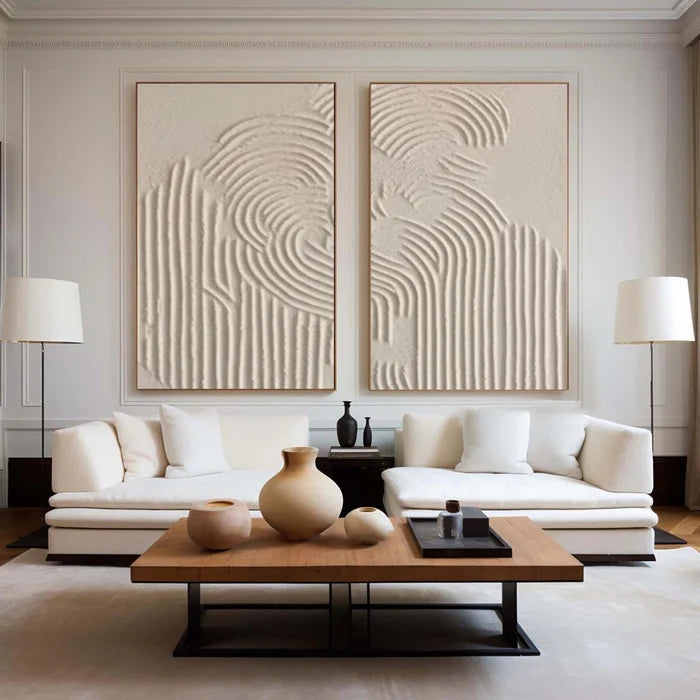
DIY Plaster Wall Art at Home: A Step-by-Step Project for a Textured Statement
Start with the plaster art guide to understand what the medium is, then follow the project steps. You can make DIY plaster wall art at home with a pre-stretched canvas, a texture medium, a palette knife, and paint. The project fits into a weekend with drying breaks in between. Treat it as a creative experiment: DIY gives you a one-of-a-kind piece and the satisfaction of making it yourself, while a commissioned painting brings consistent materials, finishing, and support.
What You Need to Start
Gather the supplies by category rather than by brand, and start with the minimum:
- A pre-stretched canvas or a rigid board
- Gesso or primer, if the canvas is raw
- A plaster-based texture medium or acrylic modeling paste
- Palette knives in a couple of sizes
- Acrylic or oil paints
- A soft brush for finishing
- A sealer or varnish, if you want a protective coat
- A drop cloth and painter's tape
Each item has a role. The canvas or board is the foundation and carries the weight of the texture. The texture medium does the sculpting — it is the material that turns a flat surface into a raised one. The palette knife is your main tool for dragging, sweeping, and stippling. Paint brings color to the relief, and the sealer protects the finish once everything has cured. Everything else on the list is convenience rather than necessity.
You do not need a full studio setup for the first piece. For close-ups of the same techniques, the beginner's plaster wall art tutorial is a useful companion as you work.
Choose the paint family before you start, because it sets the project's pace. Acrylics dry quickly and clean up with water, which suits a weekend timeline; oils stay workable longer but add curing time before sealing. The texture medium and the paint should be compatible — read both labels — so the paint sits on the relief without stressing it.
Preparing Your Canvas
Start with a clean, dry surface. If your canvas is raw or lightly primed, apply a thin coat of gesso and let it dry completely before adding texture. For an even tooth, sand lightly between coats and wipe away the dust. Tape the edges if you want a clean border, and cover the work surface with a drop cloth because texture work is messy. Work in a ventilated room, especially with oil-based materials.
The goal is a stable base: a smooth, dust-free canvas helps texture stay where you put it and gives the paint an even surface to sit on. A canvas that flexes while texture dries can stress the medium, so if you plan deep, sculptural relief, a rigid board or cradled panel is the safer foundation from the start.
Also notice the canvas depth. A gallery-wrapped canvas with a deeper profile gives the texture more visual presence at the edges and is easier to hang later; a thin canvas is lighter but can curl at the corners as texture dries. If you plan to hang the finished piece without a frame, choose the deeper profile.
Shaping Texture With a Palette Knife
Texture techniques all start from three movements:
- Drag the palette knife to make ridges and fine lines.
- Sweep it in circles or arcs for swirls and fluid forms.
- Dab it against the surface for stippled grain.
Pressure and angle change the result. A firm, flat drag makes clean, confident ridges; a light, curved sweep makes soft waves; a stipple with the tip of the knife makes fine grain. Practice each movement on a test board first, because the medium behaves differently from paint — it holds its shape, which means the knife leaves a record of every change in pressure.
Build the texture in layers rather than one thick pass. Each layer needs to dry before the next one goes on, and deep texture takes longer than shallow texture. On a large piece, work in sections and let each section dry before the adjacent texture overlaps it. Follow the drying instructions printed on the medium's label, and keep the test board close so you can try movements before they touch the final canvas.
One behavior to expect: most texture mediums dry slightly lighter and shrink a little as they cure, so a ridge that looks dramatic while wet can settle into something subtler. Build slightly deeper than you think you want, and judge the final depth only after a layer has dried.
Painting and Sealing
Once the surface is stable, paint over the ridges with a brush, letting the raised areas catch the color differently from the recesses. A simple way to add depth is to apply a base color, then dry-brush a lighter tone across the peaks; the recesses keep the darker value, which makes the relief read clearly. For oils, allow proper curing before adding more layers; for acrylics, follow the label's drying guidance.
Sealing is optional at home. If you use a sealer or varnish, apply it only after the paint has cured and follow the manufacturer's instructions — sealing too early can trap moisture and change the finish. If you skip the sealer, expect the texture to gather dust over time; gentle dusting with a soft dry brush keeps it looking fresh.
Professional studios make this decision per piece: depending on the paint and texture medium, an appropriate protective finish is applied after the surface has cured. For a weekend project, the same rule of patience applies — do not rush the drying steps.
If you seal, choose the sheen deliberately: matte keeps the texture quiet and painterly, while satin and gloss catch more light and make the relief more pronounced. Test the sealer on the scrap board first, because the same varnish looks different over white texture than over a dark base.
DIY vs. Commissioned Art: An Honest Comparison
Be honest about what each route delivers:
| Consideration | DIY piece | Commissioned plaster art |
|---|---|---|
| Material control | You choose every product | Studio-verified canvas, paint, and texture |
| Time | A weekend plus drying breaks | About one week of creation plus shipping |
| Uniqueness | One of a kind, by your hand | Hand-painted, one of a kind |
| Consistency | Varies with experience | Studio process plus preview before shipping |
| Support | None beyond your own work | Preview, 30-day guarantee, and care guidance |
The comparison is not about which is better — it is about what you value. A DIY piece carries your hand and your choices, which is exactly why people keep them. A commissioned piece carries a studio's process: verified materials, consistent finishing, a preview step before shipping, and support if something is wrong. If the wall is a long-term commitment, the commissioned route removes more risk; if the project itself is the point, DIY is the richer experience.
Time is the hidden cost of DIY. Between drying layers, a deep-texture project can stretch over several sessions, and the first attempt is often a learning piece rather than a keeper. If you are weighing the purchase decision itself, the plaster texture painting review covers quality, weight, and value honestly.
Vinchy Art Studio Recommendation
In the Vinchy Art studio, texture work starts with the surface: canvas is primed, texture is built in layers, and drying is never rushed. For DIY makers, the studio recommends starting small, following the drying time on the medium's label, and testing paint on a scrap piece before the final surface. A weekend piece is a great teacher; a wall you live with for years is where professional materials and finishing earn their place.
Conclusion
DIY plaster wall art is a satisfying weekend project that produces a piece nobody else has. Prepare the canvas, build the texture in layers, paint and seal with patience, and compare the result honestly with commissioned work. The process teaches you how texture medium, light, and paint behave together — knowledge that makes you a better judge of professional art later. If the project sparks a lasting interest, the step up to studio-finished pieces is a natural one.
Weekend Project Checklist
- Canvas primed and dry
- Workspace covered and ventilated
- Texture medium and palette knives ready
- Layers dried between applications
- Paint tested on a scrap board
- Surface checked under raking light before sealing
- Sealer applied per manufacturer instructions
- Piece left to cure before hanging
FAQ
Can I make plaster art without actual plaster?
Yes. Acrylic modeling paste and texture gels are common alternatives. "Plaster" and "texture paste" are different materials, so read the label and choose by the surface and flexibility you need.
How long does DIY plaster art take to dry?
Drying depends on the medium, the thickness of the texture, humidity, and temperature. Follow the drying time printed on the product and let deep layers dry longer between applications; rushing layers is the most common beginner mistake.
Do I need a special canvas?
A good pre-stretched canvas works for most projects. For heavy, deep texture, a rigid board or cradled panel is more stable, because thick texture can pull on thinner canvas over time.
Can I change a piece after it dries?
With acrylics, you can paint over earlier layers; with oils, allow proper curing before adding more. While the texture is still wet, you can reshape it with a palette knife.
Is DIY cheaper than buying art?
Upfront materials can cost less, but the total includes tools, redo risk, and your time. A commissioned piece includes studio materials, finishing, preview, and support, which changes what the price represents.
See Professional Results
If you want to compare your first attempt with studio-finished work, browse the 3D textured plaster art collection at Vinchy Art — every piece is hand-painted, made to order, and previewed before shipping.